Summary:
Looking for some easy fixes to restore Oracle dmp file? Don’t go anywhere this article will surely help you out in performing this task flawlessly.
Apart from that, the blog will also help you out grab every pinch of detail regarding this Oracle dmp file.
What Is DMP File In Oracle?
Oracle DMP file is created by Oracle “Export/Import” tools. One can export all or a part of the database into a “dump” file, then import the result in another database on different servers and probably in different versions. DMP files are usually used for exchanging data between different platforms and databases and versions.
One can import the set of tables belonging to a user or entire table along with other related objects like procedures, triggers, constraints, etc, or the complete database. However, the import can also be done selectively. Some users also use it as a backup but actually, it is not made for backup.
What Are The Reasons Behind Corruption Of Oracle DMP File?
However, there are several reasons behind the corruption of Oracle dmp file. They are as follow:
- Due to media corruption
- Malware/virus can infect the dmp file and make them inaccessible
- Malfunction of software or hardware problem
- Sudden shutdown of the database while Oracle database is opened
- Interruptions in network connection when the database is opened
In any of the above cases, it is possible that your Oracle dmp file may get corrupted or damaged. But not to worry below are some solutions that you can follow to restore corrupted Oracle dmp file.
How To Repair And Restore Oracle Dmp File?
Method 1# Restore Oracle db dump using SQL Developer
The following steps should be followed to restore the dmp file by making use of the Oracle SQL developer studio.
- First of all, you have to copy the .dmp file within the folder which is present in the database hosting server like /home/oracle/datapump/WSO2_DATA_DUMP.dmp)
- Execute the following command for making new schema and allowing relevant privileges to users.
CREATE USER ramindu IDENTIFIED BY ramindu;
GRANT CONNECT TO ramindu;
GRANT CONNECT, RESOURCE, DBA TO ramindu;
GRANT UNLIMITED TABLESPACE TO ramindu;
- Run the following command for making the SQL data pump directory. This will also give allowance to users which are created above to perform DBA related actions.
create or replace directory ramindu_data_pump as ‘/home/oracle/datapump’;
GRANT DBA TO ramindu;
grant create session, grant any privilege to ramindu;
grant all privileges to ramindu;
grant read, write on directory synprod_data_pump to ramindu;
grant exp_full_database to ramindu;
grant imp_full_database to ramindu;
- Make new connection like this:
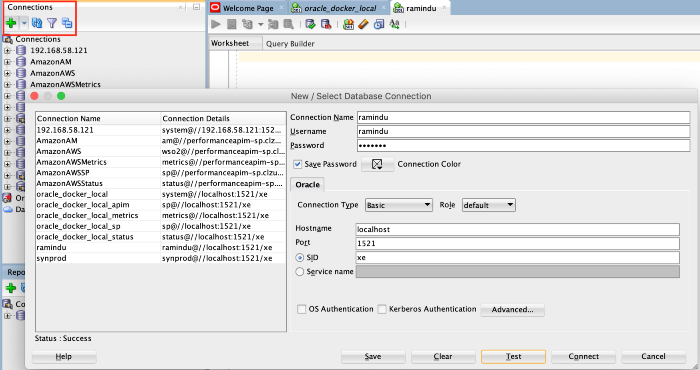
- Setup the connection just like a DBA connection
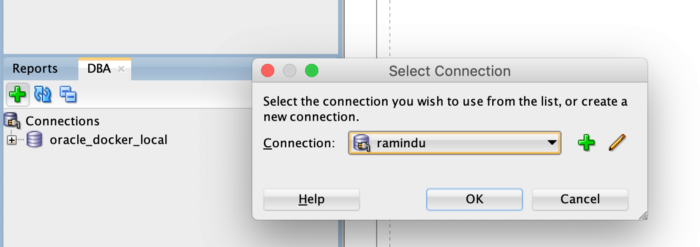
- Expand the complete connection and make a right click on the ‘Data Pump’. After that choose the ‘data Pump Import Wizard’.

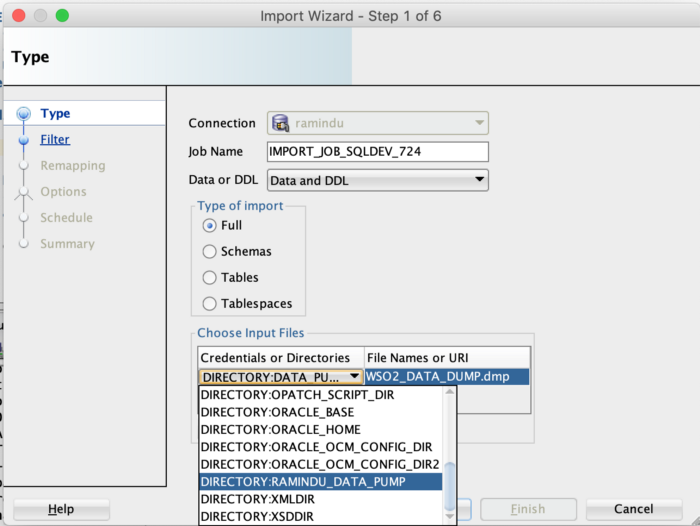
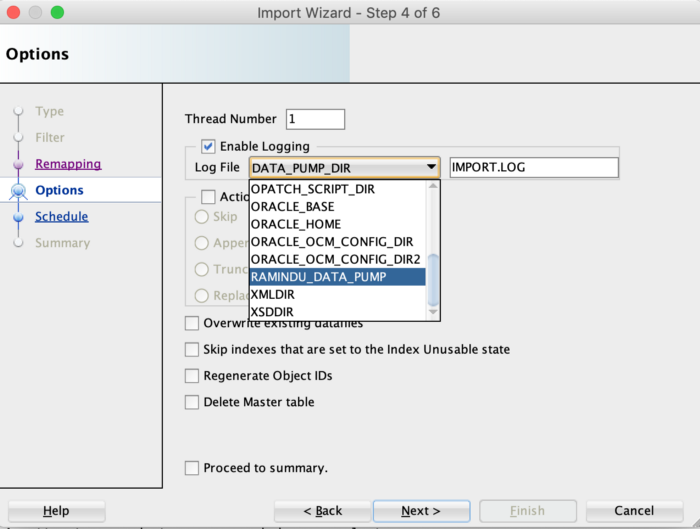
- Choose the SQL data pump directory name such as; ramindu_data_pump which is assigned in the previous SQL command steps. Now give the data dump name like; WSO2_DATA_DUMP.dmp as the “File names or URI” column.
- In the next opened window hit the Next.
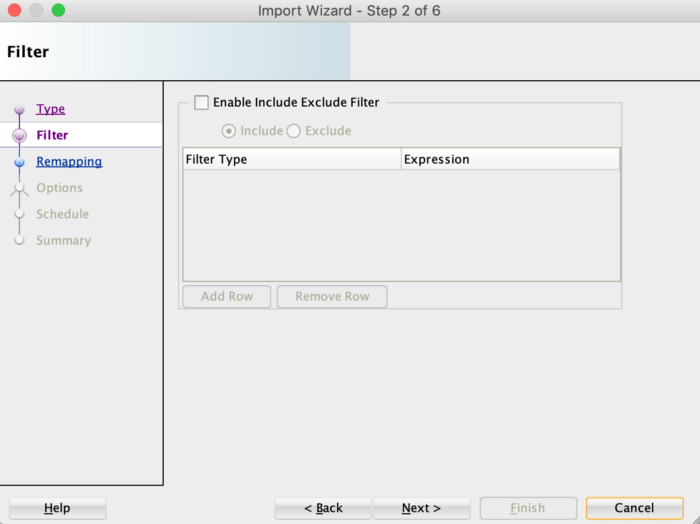
- Hit the “add row” option from the Re-Map Schemas and then choose your schema from the database dump like a source. After that assign the destination as you’re the new created schema. Hit the next.

- Choose the created SQL data pump directory for saving up the log file after that click the next.
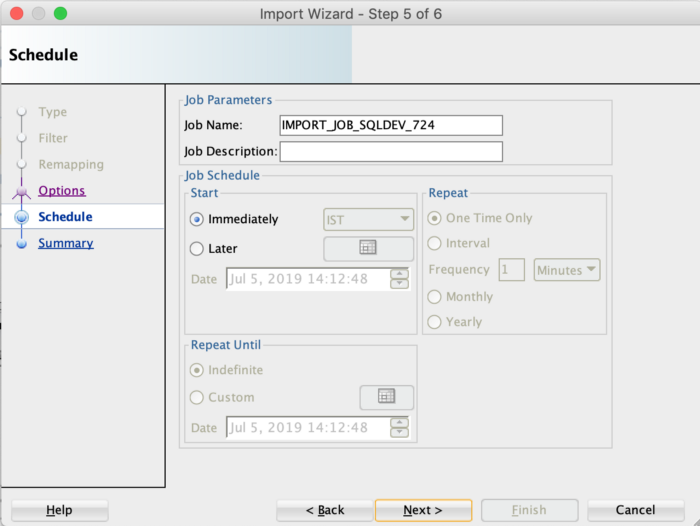
- In the job schedule section choose the “Immediately” option and then hit the next button.
- Tap to the finish.
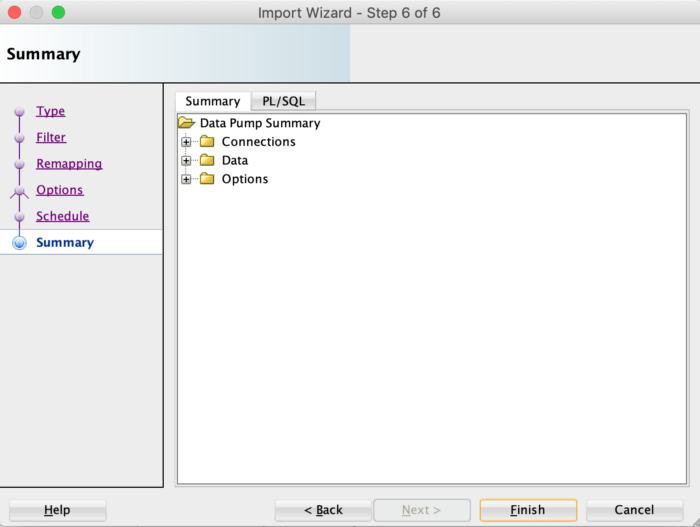
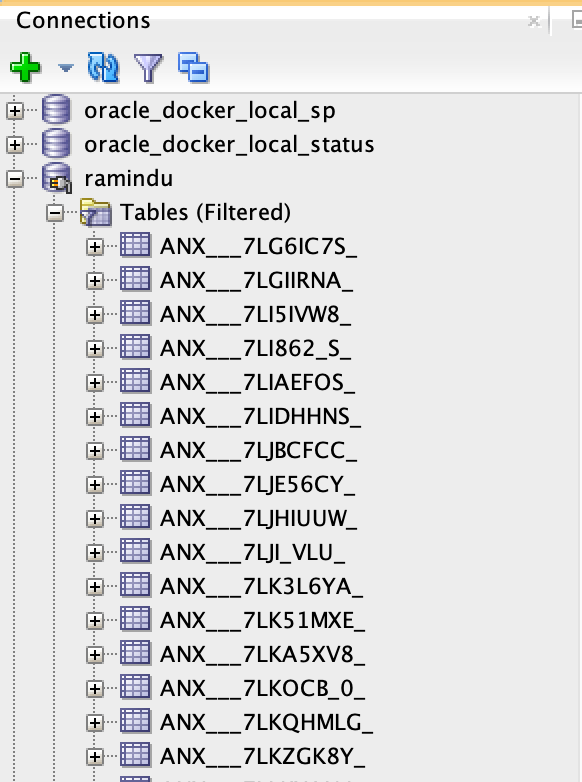
- In the left panel, you can easily find the tables in the left panel.
Solution 2# Import Oracle Dump File Into Oracle Schema
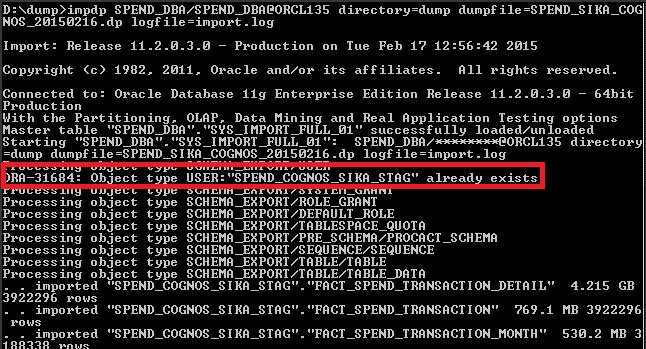
Oracle dump file gets imported into the Oracle schema through impdp command.
Following command needs to use for importing up the oracle dump file.
impdp SPEND_DBA/SPEND_DBA@ SPEND102 directory=dump
dumpfile=SPEND_SIKA_COGNOS_20150216.dmp
logfile=import.log
Where
SPEND_DBA:
It’s a user who has the privilege of exporting and importing any schema.
In the above-given example, the user name/password is SPEND_DBA/SPEND_DBA.
SPEND102:
It’s the TNS, SID or Service ID which is essential for connecting the Oracle server.
DUMP:
In this directory location, the Oracle db dump file is been imported. This is the default location: /opt/dump.
Dumpfile:
It’s the dump file name that needs to get exported.
LogFile:
In this log file, all the error messages are logged which occurred during the dump.
You can make use of the same password and log-in detail to get an easy log in within the schema.
When the dump file of Oracle successfully gets imported, you can easily see in which schema the file was been imported.
Solution 3# Restore Oracle Dmp File
Follow the below steps to manually restore Oracle dmp file to your database:
1. Login to your SQL command line terminal. If you are using the Windows then open the command prompt or if you are using Linux then open Terminal.
2. After this login to the SQL-PLUS as a system administrator. To do this follow the below command:
“sqlplus sys/admin@ORADB as sysdba”
Eg: D:\Documents and Settings\Administrator>sqlplus sys/admin@ORADB as sysdba
3. Now you have to create a new database user
- “create user username identified by password account unlock;” For example: create user Jacob identified by Jacob account unlock
- “grant connect to username;” For example, grant connect to Jacob
- “grant create a session, dba to Jacob;” For Example, grant creates a session, dba to Jacob
4. Now log out from the SQL-PLUS. Use “exit” command to do this
5. Lastly restore Oracle db dmp file by using the below command:
“imp SYSTEM/test@ORADB fromuser=dbadmin touser=username IGNORE=Y FILE=file_path.dmp”
For Example:
D:\Documents and Settings\Administrator>imp SYSTEM/test@ORADB fromuser=WSO2_RSCE touser=jacob IGNORE=Y FILE=D:\jacob\sample.dmp
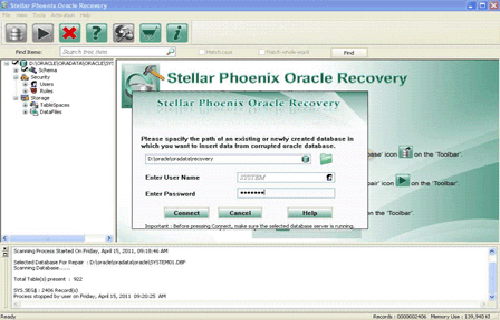
Solution 4# Oracle File Repair Tool
If you are unable to restore Oracle db dmp file by using the above solution then it is recommended that you must use a third-party Oracle File repair tool. It is designed to repair and recover corrupted oracle database objects that include oracle DMP files as well.


The tool comes with easy to use interface and anyone can easily operate it to restore damaged or corrupted oracle data. It can easily restore all the data of Oracle database such as tables, procedures, queries, XML content, etc.
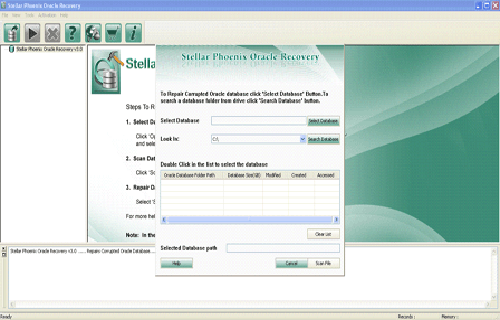
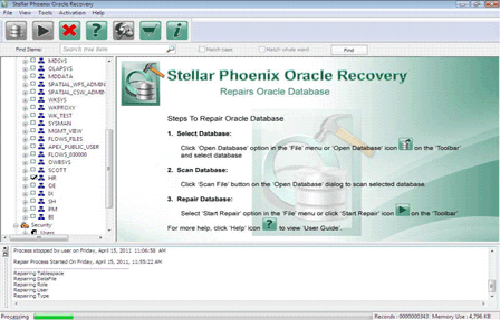
Steps To Use Oracle File Repair Tool To Repair Oracle Dmp File
Step 1: Search the Initial screen of Oracle File repair tool with a pop-up window showing options to select or search corrupt Oracle databases on your computer.
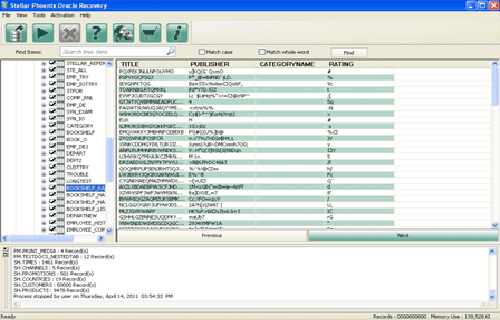
Step 2: Click Scan File to initiate the scan process after selecting the oracle database. The recoverable database objects get listed in the left-side pane.

Step 3: Click an object to see its preview.
Step 4 : Click Start Repair in the icon bar to start the repair process. A pop-up window is displayed which shows the steps needed to perform further. Click next and continue.

Let’s Wrap Up:
In the above post, I have tried my best to cover all the possible manual tricks to repair and restore Oracle dmp file. Along with that, I have also discussed all the possible reasons behind Oracle dmp file corruption. Users can also opt for a reliable 3rd party repair tool for resolving any oracle database problems effortlessly.

Jacob Martin is a technology enthusiast having experience of more than 4 years with great interest in database administration. He is expertise in related subjects like SQL database, Access, Oracle & others. Jacob has Master of Science (M.S) degree from the University of Dallas. He loves to write and provide solutions to people on database repair. Apart from this, he also loves to visit different countries in free time.